
1. Planning and Preparation
Before diving into the installation process, it is crucial to plan and prepare adequately. This phase involves several sub-steps:
a. Choosing the Right Hardwood:
Select the type of hardwood that best suits your needs. Consider factors such as wood species, grain patterns, color, and board width. Popular choices include oak, maple, cherry, and walnut, each with its unique characteristics and aesthetic appeal.
b. Measuring the Space:
Accurate measurements are vital to determine the amount of flooring material required. Measure the length and width of the room, and calculate the square footage. Add an extra 10% to account for wastage due to cuts and mistakes.
c. Acclimating the Wood:
Hardwood flooring needs to acclimate to the room’s environment to prevent expansion or contraction after installation. Place the wood planks in the installation area for at least 48-72 hours before starting the project.
d. Preparing the Subfloor:
Ensure the subfloor is clean, dry, and level. Remove any old flooring, debris, and fix any imperfections or moisture issues. A well-prepared subfloor is critical for the stability and longevity of your hardwood floor.
2. Gathering Tools and Materials
Having the right tools and materials on hand will make the installation process smoother and more efficient. Essential tools and materials include:
- Hardwood flooring planks
- Moisture barrier (if needed)
- Underlayment
- Tape measure
- Chalk line
- Saw (circular or miter saw)
- Hammer and nails or flooring nailer/stapler
- Pry bar
- Level
- Safety gear (gloves, goggles, knee pads)
3. Installing the Moisture Barrier and Underlayment
A moisture barrier is essential, especially if you are installing hardwood floors over concrete or in a high-moisture area like a basement. This barrier prevents moisture from seeping into the wood and causing damage. Roll out the moisture barrier and secure it with adhesive or tape.
Next, install the underlayment. The underlayment provides a smooth surface for the hardwood planks, reduces noise, and adds a layer of insulation. Roll out the underlayment, ensuring it covers the entire floor surface, and secure it with tape.
4. Laying the First Row
The first row of hardwood planks sets the foundation for the entire floor, so it must be installed accurately. Start by laying the first plank along the longest wall, leaving a ½-inch gap between the plank and the wall to allow for expansion. Use spacers to maintain this gap consistently.
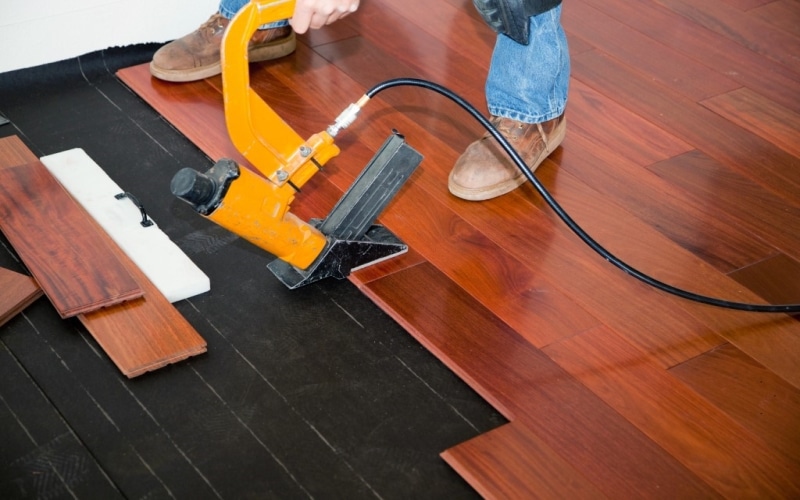
Secure the first row by nailing it into the subfloor. If you are using a nail-down installation method, angle the nails through the tongue of the plank at a 45-degree angle. For a glue-down method, apply adhesive to the subfloor and press the planks firmly into place.
5. Continuing the Installation
Once the first row is secure, proceed with laying the subsequent rows. Stagger the end joints of the planks to create a more stable and aesthetically pleasing floor. Use a tapping block and a mallet to ensure the planks fit tightly together without damaging the wood.
For each row, check that the planks are straight and level. Use a chalk line to guide your installation and adjust as needed to maintain alignment.
6. Cutting Planks to Fit
As you approach the walls and other obstacles, you will need to cut planks to fit. Measure the space carefully and mark the cut line on the plank. Use a saw to make precise cuts, ensuring the plank fits snugly into place while maintaining the expansion gap.
7. Installing the Final Rows
The final rows may require additional adjustments and careful fitting. Often, the last row of planks will need to be ripped (cut lengthwise) to fit the remaining space. Use a table saw or circular saw to make these cuts.
Once the last row is in place, remove the spacers and install the baseboards or shoe molding to cover the expansion gap. Nail the molding to the wall, not the floor, to allow for the wood’s natural movement.
8. Finishing Touches
After the hardwood floor is installed, the final step is to add finishing touches:
a. Sanding (if needed):
If you installed unfinished hardwood, sand the floor to smooth out any imperfections and prepare it for staining and sealing. Use a drum sander for the main area and an edging sander for the perimeter.
b. Staining and Sealing:
Apply a stain if you desire a specific color, followed by a protective sealant to enhance the wood’s durability and appearance. Allow each coat to dry thoroughly before applying the next.
c. Cleaning:
Clean the floor to remove any dust and debris. Use a vacuum with a soft brush attachment or a damp mop for this purpose.
9. Maintenance and Care
Proper maintenance and care will ensure your hardwood floor remains beautiful and functional for years to come. Regularly sweep or vacuum to remove dirt and debris. Use area rugs in high-traffic areas to protect the floor from scratches. Avoid using harsh chemicals or abrasive cleaners that can damage the finish.
In conclusion, installing hardwood floors is a rewarding project that enhances the beauty and value of your home. By following these key steps and taking your time to execute each phase with precision, you can achieve professional-looking results that will stand the test of time. Whether you choose popular hardwoods like oak, maple, cherry, or walnut, or opt for the distinctive appeal of elm wood flooring, understanding the process will help you make informed decisions and appreciate the craftsmanship involved. Elm Wood Flooring, known for its unique grain patterns and durability, can add a special touch to your home, making it a standout feature. Whether you tackle the installation yourself or hire a professional, your new hardwood floor will undoubtedly become a cherished part of your living space.